WordPress media library is where you can find all media uploads and use them to enrich your content.
However, a growing media library typically looks like a cluster of thousands of multimedia files. By default, they are placed in year- and month-based order and that’s the only way you can filter them out.
Sometimes it can be really hard for you to find the image you’re looking for in a particular post. To help you do that faster and much more efficiently, FileBird – WordPress Media Library Folders is built to create and manage folders.
FileBird is a plug and play productivity tool, meaning you can start adding new WordPress folders right after activating it. This tutorial aims to show how to make use of FileBird plugin in favor of an anal retentive person – like me. 😀
Let’s dive in.
Organize media files in folders
Drag and drop multiple files
After installing and activating FileBird, you will have an integrated folder tree right inside WordPress media library dashboard.
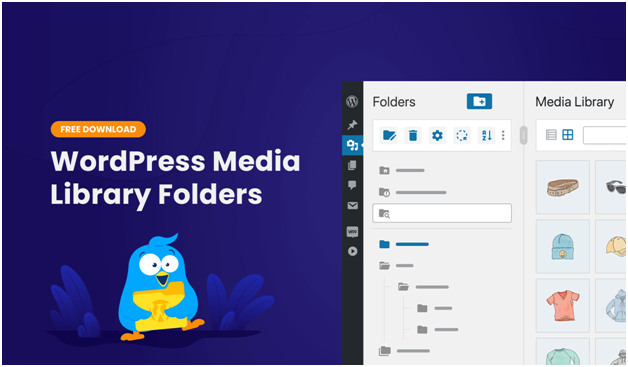
It has a pretty intuitive interface which is similar to how you always organize files and folders on Windows, MacOS, Google Drive and other cloud storage.
You can categorize existing media files & new uploads in a drag and drop user interface. Let’s bulk select files and move them to the destination folder. Don’t worry if you drop them in the wrong folder as you can always move them back. This action won’t make any changes to the file’s permalink at all.
It’s very easy to rename, cut, paste or delete any folder. Feel free to play around and create your own file management order.
Upload multiple folders and files from desktop to WordPress
FileBird drag and drop interface even supports those folders on your computer! Now you can bulk upload several folders and subfolders all at once.
What’s great about this feature is the retained folder structure, meaning your way of file organization is reserved and enhanced.
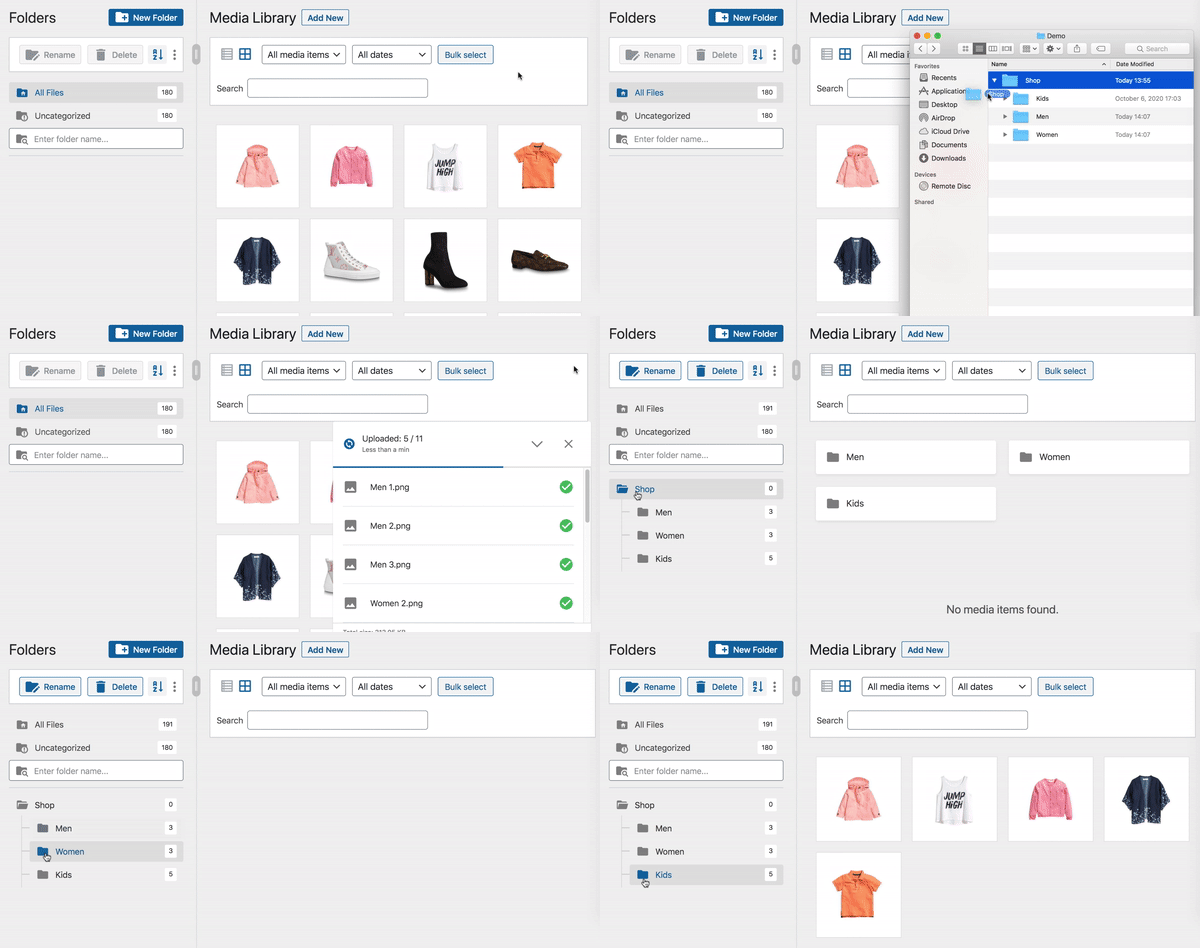
This is a big time saver for online shop owners who have categorized product variables in their folders on the computer. They only need a single drag-and-drop to import all product images to WordPress media library!
We’ve learnt about uploading to WordPress, from here we go to the next useful feature of download.
Download media library folders
There are various methods to export or download the entire WordPress media library. You can use FTP, cPanel, Filester file manager, or a media library export plugin. Whichever way you choose, you’ll download a clustered ZIP file containing all original media files and their auto-generated image versions.
Since you export the media library to backup and re-use the pictures in a migrated website, keeping those WordPress generated thumbnails in different dimensions can be annoying.
You will have to manually delete unnecessary image files. Therefore, the media library export might not be so helpful on the new site, new theme, or platform.
FileBird has recently released a new premium feature, which addressed the problem. It allows you to choose a specific media folder to download. This ZIP file contains only the original size of your media uploads. Sounds cool, huh?
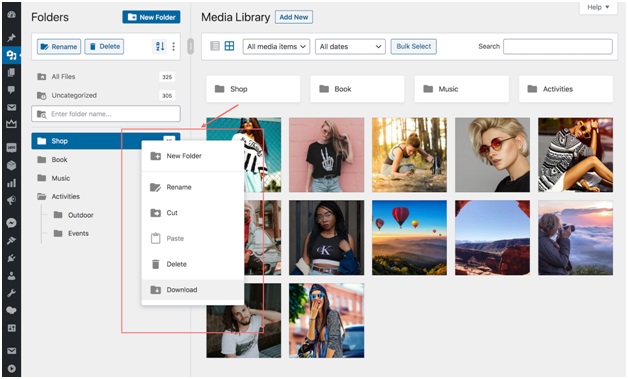
By right-clicking on a folder, you can choose the Download option from the drop-down menu and easily save the media folder in your computer.
If you download the main folder, it would include nested folders and keep the same folder structure, too. Thus, this is a very simple way to back up files for WordPress non-techies like designers, photographers, food bloggers, or ecommerce stores.
Multi-user and multi-blogging
When it comes to organizing stuff, not everybody agrees on each other’s way of categorization. So FileBird provides a new way to solve the problem.
If you navigate to Settings menu > FileBird, you will see an option to enable/disable user based folders. With this switcher enabled, each user can create their own folders and categorize the media library in their own ways. They will only see the folders created by themselves and not intervene in other users’ categorized media files.

Please note that if you are in this mode [On], the previously created folders from the other mode [Off] won’t be shown, even when you are in the admin role.
Sort files and folders
FileBird pro version also allows you to access its advanced sort functions. It can be extremely helpful for searching and arranging product variation images.
As you can see in the screenshot below, the Sort icon is integrated into WordPress media library.

You can sort folders in the folder tree based on their names or reset it to come back to your custom order. As for file sorting, all media files in each folder are arranged in the ascending/descending order based on their name, date, modified date, and author.
Therefore, you will have much more different abilities, meaning 8 ways to sort WordPress media files granted!
FileBird gallery in pages and posts
Here’s the great news:
FileBird free version comes with full compatibility when working with Gutenberg editor.
Create a photo gallery
When editing pages and posts in Gutenberg, you can always browse files via the folder tree you’ve created. This file explorer also supports dragging and dropping files, uploading files to a selected folder, moving any folder up or down for quick access.
It’s also convenient for you to showcase a dynamic picture gallery. To do this, please choose the FileBird Gallery block and select a folder in the block settings, for instance, Travel folder.
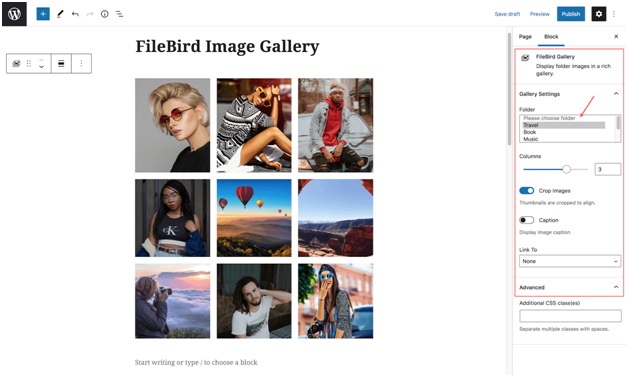
You can set column layout, omit specific photos, edit captions and show auto-cropped images. Until you are happy with the preview display, that is also what you get when publishing the page/post.
Create a document gallery
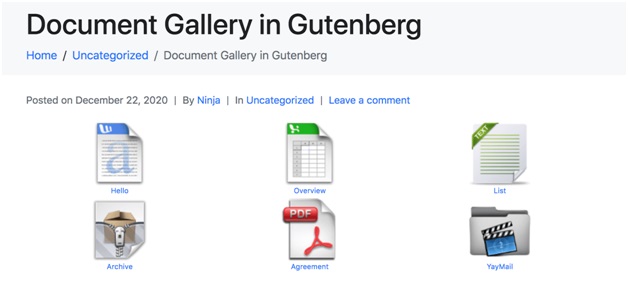
With FileBird folders, you can create a gallery devoted to document files, including their file format thumbnails.
Each FileBird folder is assigned with a folderID, you need to enter the shortcode with that folderID to put up a correspondent document gallery like this.
For more details, please visit the FileBird plugin homepage.
Conclusion
A well-organized WordPress media library leads us through a clear line of content creation process.
I hope this article has helped you learn what FileBird is and how to make it work for you. There are more to explore in the premium version. Yet you can always try the free version first to see if it fits your goal.
In my opinion, if you are a WordPress blogger and Gutenberg becomes your go-to editor, FileBird Lite is more than enough. So just go ahead and give it a try. Have any thoughts on this topic? Don’t hesitate to leave comments below.

